
Last Updated:July 12, 2026
Do sail shades withstand the wind?

Sail shades are not just for sailboats and sailors anymore! This article will discuss how many different types of sail shades there are, what the benefits and drawbacks to each type are, and which ones might be best to purchase depending on your needs.
High quality sail shades are rated to withstand wind of 85 miles per hour in short gusts. This requires professional installation, and there are always some risks.
In this post, we’ll start with the basics and then go into detail about how to get the best results for your sail shade. As our normal disclaimer, we are not licensed contractors, but rather average DIYers who enjoy projects around the home.
If you live in a windy area or you are concerned that you’re installation will be tested, then we recommend hiring a professional. This post is merely general tips to help someone who is new to DIY projects.
What are sail shades?
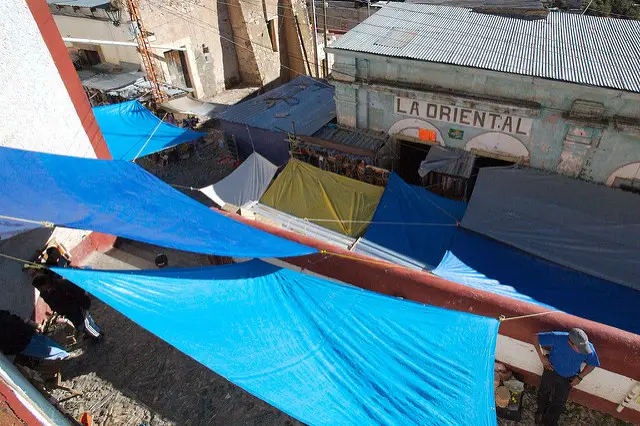
Sail shades are large blocks of fabric that provide shading from the sun. They have a D ring connector at each corner, and these will either attach to the fascia of your home or to the top of support poles.
One of the big benefits that sail shades offer over awnings is that they can easily be taken down by a single person, and this is our first tip.
Sail shade are both more economical than a traditional awning and they are more flexible when it comes to moving them.
Bring in sail shade before storm
Most residential backyard/patio sail shades are installed around the 8′ mark. This makes them fairly easy to take down by someone on a step ladder. We can take down a sail shade in about 10 minutes on a clear day before the storm hits.
As a word of warning, don’t try to take the sail shade down once the storm starts or if it’s very windy. The reason is that as soon as you disconnect the fabric corner from it’s connector, the D ring will have a lot of potential energy. This may cause you to fall from the ladder if you hold on or result in the stainless steel D ring flapping around and possibly hitting you.
Only take down or put up the sail shade on a calm time before the storm gets bad.
Check screws to sail shade connectors
At least once per year and before major storms, I recommend checking the screws that are anchoring the brackets. Many people forget about these as a possible point of failure until they come out of the wall.
If you live in an area near a rail road track or near an airport, you may want to research a spray that will help the bolts and screws stay in the wall better. A little bit of Loctite on the bolt and screw can go a long way into ensuring that it doesn’t get jarred loose.

- Lock and Seal Fasteners: Prevents loosening of metal fasteners caused by vibration on small motors, mowers, and power equipment
- Prevents Rust and Corrosion: Protects from leaks, rusting, and corrosion and eliminates need to stock up on expensive lock nuts and washers
- Removable: Can be removed with hand tools
- Easy and Quick: Sets in 10 minutes and fully cures in 24 hours
- For 6-19mm Fasteners: Medium-strength formula for use on threads for 6mm to 19mm nuts and bolts

This works by putting adhesive on the threads making it harder for them to get shaken outward. There is one word of warning though, this will make it more difficult for you if you are going to disassemble it later.
Use a metal support bracket when attaching a sail shade to your home
When you attach the connector via a single screw, you are creating a single point of failure. This also means that all the force is pulling against this lone screw. By using a bracket that is held in place by 4 or 6 screws, you are dividing the on the connection.
Remember sail shades are primary composed of a fabric sail. They are designed to catch wind and use that energy for movement. By anchoring the corners down, you are putting the force of the shade against the strength of the bolt or screw holding it in place.
Check the support poles
The support poles have a connection to the sail shade at the top. You will want to ensure this is secure and that everything is fastened well. They also connect to the ground.
On a patio this could be concrete in which case you’ll want to ensure the screws that hold it in are still tight and that the pole doesn’t move. If you have the pole dug into the ground with a cement anchor, you will want to make sure that it’s still buried and that the dirt around it hasn’t eroded away.
If you’re support pole is attached to a weighted pole that is mobile, I recommend moving the pole to minimize the impact wind would have. I’ve seen a lot of people use a pole that sits in the middle of a tire that can just be rolled to the desired location.
This type of pole can work great on sunny days, but when heavy wind comes it’s a disaster waiting to happen. The wind can get under the sail and push the pole into the air. The connectors anchoring it to the home ensure that all that force and momentum will be focused on the mobile support pole.
Normally gravity holds the beam in place so there is no movement, but when heavy wind comes it will be pulled whichever direction the wind is blowing. If you have this type of pole, we recommend moving it to a place where it can be securely attached to a structure that is anchored to the ground. This is also only as a last resort as the better option is to take the shade sail down entirely.
Choosing the right support pole
In the same way that there are different grades of bolts, there are different strengths in pole. To maximize the strength of the pole, you want to look for the largest diameter pole with the smallest gauge.
While most people understand that a wider diameter will make the pole stronger, it can be counter intuitive to look for a low gauge number. Gauge is the thickness of the wall of a pipe or support pole, and the whole system is counter intuitive. A gauge 14 tube can have between 60% and 100% wider wall compared with a gauge 19 tube.
The exact thickness and support will vary on the other dimensions of the pole, but as a general rule of thumb for the average DIYer, when it comes to steel tube or pipes, higher diameter and lower gauge lead to better strength.
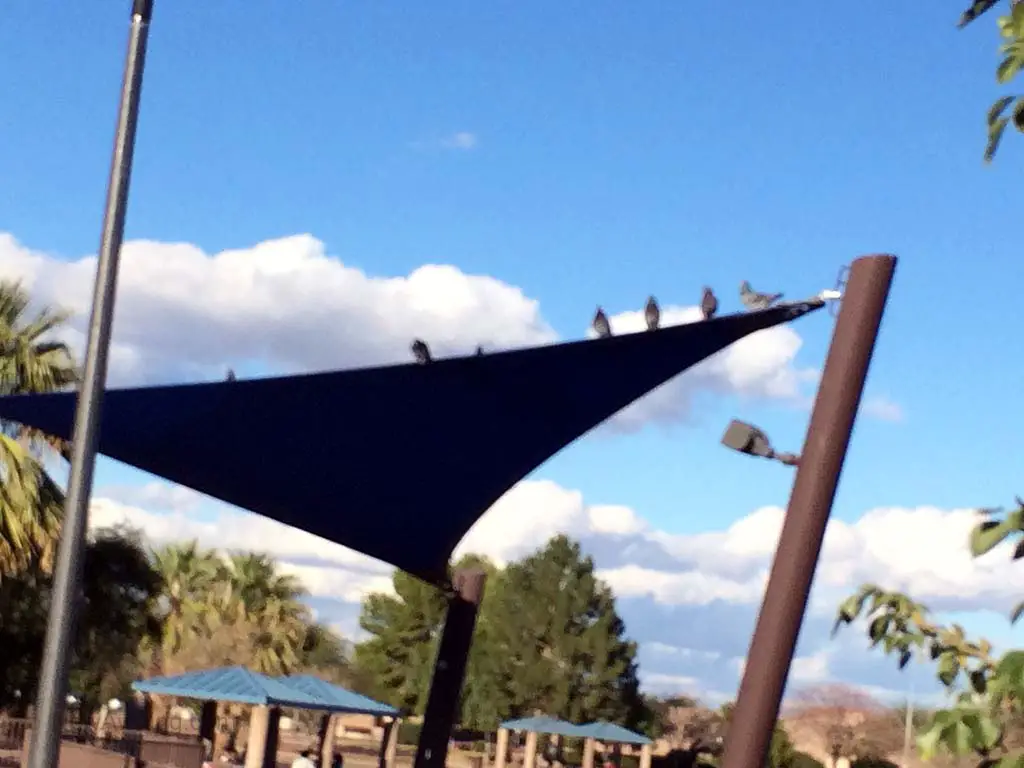
Angles make a huge difference
Many homeowners install sail shades at a slight angle so that rain and snow will roll off them. This however means there is more surface area for the wind to press against the sail to transfer it’s energy.
A completely vertical sail would be similar to what you see on a boat capturing close to the maximum amount of energy where as a completely horizontal one would have the least surface area hit by the wind and therefore take on a tiny fraction of the pulling power.
When manufacturers claim that their sail shades can withstand winds that gust upto 85 miles per hour, this is going to be under circumstances that are beneficial to them. If your sail shade is angled, you need to be aware that the amount of wind in a storm could be significantly less.
Upgrade Eye Bolts
I’ve included an image of an eye bolt below. Essentially, they are a threaded screw on one end and metal loop on the other. The purpose is to anchor something using them.
Unfortunately, they are also a possible single point of failure. The loop end gets all the force from the flapping shade and the screw is being held in place. It’s very possible for these bolts to snap rather than being pulled out of the wall, bracket or pole.
If you are concerned with this, I recommend checking with your local home depot professional for extra strength reinforced eye bolts. This is a case where going overboard is going to be better than being under prepared.
There are different grades of eye bolt. Grade 2 is the least strong with a minimum tensile strength of 60k pounds per square inch. Whereas a Grade 8 bolt has at least 150k pounds per square inch. While the required tensile strength for the Grade 8 bolts is 2.5 times that of the Grade 2 bolts, will cost only about $1.50 per bolt as of the writing of this video. ( source)
As an example, we’ve included a link to a set of four Grade 8 eye bolts below.

- 3/8 in x 6 in size for each eye bolt; includes matching nuts for secure fastening; four piece pack ideal for multiple installation needs; fit for tie downs or hanging applications
- Variety of eye bolt uses; suitable for hanging items, securing cables, or framing; eye diameter supports moderate load applications; coarse threads for fast installation
- Constructed from high-quality steel; corrosion-resistant zinc finish for durability; supports indoor or outdoor projects; reliable performance in various environments
- Ideal for tie downs, marine hardware, and cable hanging; recommended for pilot hole pre-drilling during installation; meets fastening needs for home, workshop, or industrial use
- Part of Hillman fastener hardware line; trusted for hanging, securing, or support solutions in residential and commercial projects
Angles make a huge difference
Many homeowners install sail shades at a slight angle so that rain and snow will roll off them. This however means there is more surface area for the wind to press against the sail to transfer it’s energy.
A completely vertical sail would be similar to what you see on a boat capturing close to the maximum amount of energy where as a completely horizontal one would have the least surface area hit by the wind and therefore take on a tiny fraction of the pulling power.
When manufacturers claim that their sail shades can withstand winds that gust upto 85 miles per hour, this is going to be under circumstances that are beneficial to them. If your sail shade is angled, you need to be aware that the amount of wind in a storm could be significantly less.
Wrapping up
That’s it for this post. I hope we’ve helped homeowners learn more about sail shades and what to do to help them withstand the wind. The best solution is to take them down before the storm happens.
Also, we love hearing from our readers. Do you have any tips that you think other DIYers would like to know about wind proofing their sail shades? If so, we’d love to hear from you in the comments.
Fabric weight
The density of the sail shade fabric is measured in grams per square meter. We recommend at least 150 at an absolute minimum. Anything less than this, and it will easily tear from daily use.
If you are looking for something that is more wind resistant, we prefer going with a heavier fabric that is 210 GSM or more. This will be significantly more durable than the budget fabric. This will resist ripping or developing holes that will create a structural failure in the shade.
Additionally, once the fabric is compromised, it will no longer share the load evenly. A small tear doesn’t seem like a big deal, but when the winds pick up all the forces will be pulling away from the rip and that will be the path of least resistance. This can lead to the shade completely tearing in two pieces.