


Last Updated:July 05, 2026
Sail Shades – Everything you wanted to know
Sail shades are really trendy due to their usage in shows like Desert Flippers and Hidden Potential. They are a budget friendly choice to create the indoor outdoor living area.
They are also a DIY friendly home improvement to add useful square footage. We’ve created this guide to share our best tips and tricks whether you are looking to buy a sail shade or simply want to extend its lifespan. Finally, we’re happy to answer any questions you have on the subject so just send us a tweet, and we’ll get back to you.
Sail shade shapes
There are three main shapes which are rectangle, right triangle and equilateral triangle. We’ll share some of the best uses for each choice below:
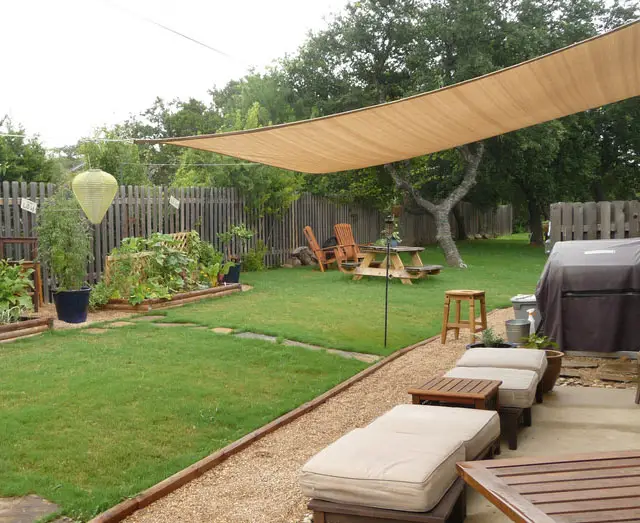
- Rectangle – The are great for covering a patio or porch to create a nice indoor outdoor area. They can be used to provide shade for grilling out or to create a nice dry area on a rainy day. They have an eyelet at each corner, and they can either be hung horizontally to provide cover from the sun/rain or vertically. People often hang these vertically to create a privacy screen for close neighbors or to block the side of their home from the sun to keep cooling bills in check.
- Equilateral triangle – These are fantastic for creating shade in a pool, swing set, or sand box. They also work well if you’re creating a shady patch for a pet. This shape excels at adaptability. There are three anchor points, and normally 2 are permanently attached to the home. The third either be tied to a tree or a movable pole so that it takes minutes to setup or take down.
- Right triangle – We see these less than the other two shapes, but they serve a unique need so we wanted to include them. The 90 degree angle of these fits perfectly in the corner of a home. They will create an amazing backyard or patio picnic or grilling area.
Sail shade materials
Most of the sail shades are made from polyethylene. This is a hydrocarbon material that feels a bit like a woven vynil. It is not machine washable. If you need to clean it, a damp clock with some all purpose cleaner is the best method. The fabric is water resistant, but not waterproof. The material is measured in GSM which stands for “Grams per Square Meter”. Fabrics that have a 180 GSM are on the lighter side. They would best be used for hiking where they will be setup for overnight trips. On the other end of the spectrm, there is 260 gsm fabric. These are used for commercial sail shades that are expected to stand year around even in harsh weather.
How tight do you install a sail shade?
I hear and see a lot of home owners get confused on this question. The brackets need to be securely anchored to something that won’t move such as house, tree, or fence. You’ll want to find a stud or other similar solid point. The fabric should be attached tight enough that it has some given but won’t flap back and forth in the wind. They will be fine bowing or stretching with the breeze. The issue comes when there is too much slack which can lead to tearing.
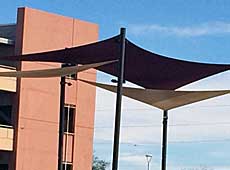
How large can a sail shade be?

This really depends on the quality of the material and strength of the brackets. The image to the right is a sail shade that is hung over a bridge in Tempe, Arizona.
It is probably more than 300 square feet of material. The entire scene is quite impressive, and it is completely free to walk across the bridge for pictures if you are in the area.
How do you measure for a sail shade?
When you are measuring for a rectangle, you will want to decide how large of an area you want to have shade. Once you have that, you’ll want to get the shade that is about 20% larger. The reason is that the sun isn’t directly overhead at all time. The increase in the fabric size creates this buffer. Quick note: A lot of sail shades are cut with a concave arc in their sides. This shape is stronger and more wind resistant than a absolute straight edge.
How do you clean a sail shade?
The best way to clean a sail shade is with warm water and all-purpose cleaner. You can use either a soft bristle brush or a cloth to wipe away and dirt or debris. You don’t want to apply a lot of pressure as this can lead to tears in the material so a gentle scrub is the way to go.
Once you have all the stains washed way from the shade, you will want to spray it off with a garden hose and let it dry in the sun. We recommend hanging it on a slight incline so the water will drain off so that it will dry much faster.
If you pack up your sail shade for the winter or off season, you always want to make certain that it is completely dry to avoid any mold or mildew growing in the box that you store it in.
How do you fix a hole in your sail shade?
It’s rather straightforward to replace a hole in a sail shade, and the cost is less than $6.
- The first step is to clear and dry the around the hole. You will want to use an all purpose cleaner and a soft bristle brush. Rinse and let it fully dry before proceeding.
- Second apply a strip of awning repair tape in a square around the hole. Be generous around the sides of the hole as you want to have an inch around the hole on all sides. It’s acceptable to layer the tape if the hole is larger than the 5″ width of most tapes.
- Third, the repair is complete, but you will want to check back every few weeks and after any heavy wind to ensure the tape is holding to minimize the chance of the tear getting worse.
How do you install a sail shade?
As we’re fans of This Old House show, we found a perfect video of the guys there professionally installing a sail shade in a very windy environment.
Most people won’t need to use all the steps from the video, but you can decide the lengths that you go to in order to secure the support poles for your home since every piece of property will have distinct challenges.
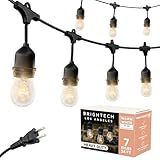
Adding lights to a sail shade
One method to really enhance the appearance of a sail shade is to add lights. The lights can be as large as edison bulbs that are strung along a wire adjacent to the sale shade or small LED rope that attach directly to the shade itself.
Regardless of your which sail shade you choose, we suggest checking out our complete guide to awning lighting to see which one is best for your backyard.
How do you clean shade cloth sails
You will want to wash the sail on a sunny day. The reason is that you don’t want it to get rained before it is fully dried.
You will want to take remove the shade from its brackets and lay it on a clean flat surface like a patio or across a picnic table.
Use a garden hose to spray the shade with moderate pressure. You don’t want the pressure too high because it can lead to tears in the fabric.
Once any dirt and debris has been washed from the fabric, you can wipe it down with a soft bristle brush and regular dish soap.
Finally fully rinse the fabric to remove any soap residue and allow the fabric to fully dry before reaattaching to the brackets.
How do you clean mold on sail shade fabric?
If your sail shade gets mold, we recommend taking it down and cleaning as described in the previous section. You will want to be certain that you brush all areas that are covered with mold.
If this fails to remove the stain, you may consider adding some bleach to the soapy water and brushing it again. There is a risk of the fabric being discolored from the bleach.
I suggest this only as a last resort if you have stubborn mold or mildew stains that stay after traditional cleaning.
Visitor Questions on Sail Shades
We would love to answer any questions you have about sail shades for the home or RV. If there’s something you want to know, but isn’t covered here just send us a tweet, and we’ll get back to with our thoughts on the topic. Our twitter handle is @newawning