Last Updated:July 12, 2026
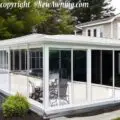
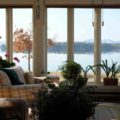
How to turn a covered patio into a screened porch
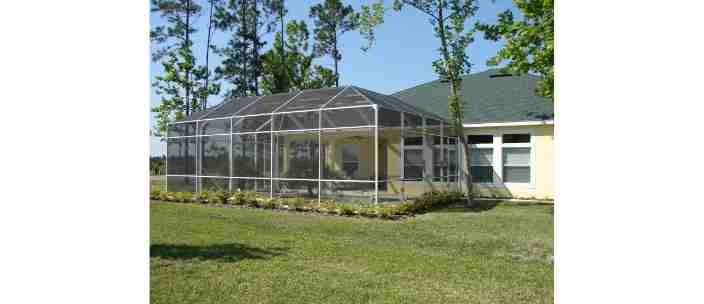
Growing up in the south, we seemed to spend some time every weekend on a screened porch. They are a great way of spending time outside to get fresh air without being overrun by insects.
Adding a screen to a covered patio or porch is also an extremely easy DIY project than can be done by beginners. Another perk is that the material is both forgiving to mistakes and fairly inexpensive should you ever make a mistake.
A 8’x10′ porch can be screened for less than $400 in an afternoon. This is also a project that can be accomplished by a solo person with no extra set of hands helping.
Over the years, we’ve seen several questions on adding screens to permanent awnings that we decided to write this full guide to creating a screened in patio.
Sketch a diagram of patio
The first step is to measure the patio so that you’ll know how much raw materials that you’ll need for the project.
Once you have the measurements, roughly draw the layout you want on a piece of paper. We really prefer graph paper or a graphic program with a grid layout.
In your sketch decide where you want the support beams to go. The minimum width between beams will be determined by the width of the screen rolling. Some screen rolls come in 8′ roles meaning that you can use this vertically and go from one wall to another.
Remember though, the beams provide support and rigidity. If the beams are placed too far apart, the screen will be very easily ripped so we like putting support beams every at least 6′. We believe this will be easier for most beginners who make up the majority of our community.
Another perk using extra support beams is that the screens will be isolated. It will be far less costly to replace a tear in a screen that is 6’x4′ compared with the same size tear in a screen that goes the full length of an 8′ wall.
Remember that the channels to attach the screen to the framing come in 8′ sections. You also won’t want to cobble together a long channel out of a lot of smaller cutoff strips. This won’t be strong enough to hold the screen tightly so the cutoffs from the 8′ ends will normally just go to waste.
When calculating the amount of screen you’ll need we suggest adding 10% for overage. This will allow you to safely cut the edge without needing to be precise. Remember, it’s far better to the piece a tad big because it can be trimmed after it’s fully installed rather than too small as it can’t be extended after it’s cut.
Gather the tools you’ll need
Since this project is being written with the beginner DIYer in mind, I’ve included a list of all the tools you’ll need. This way you will know what you need before starting.
If you don’t have one or more of the tools, they can often be rented at your local Home Depot. The only specialty tool you’ll need for this project is the roller knife, and it’s under $10. Because of this, our preference is to just purchase the tools for future projects.
The only tool for the project that would have any reason to rent would be the drill. Most beginners will be able to start out with an entry level drill whereas this project will be easier with an impact drill. We don’t suggest this tool as a purchase for people new to DIY home projects.
We’ve included links to our pick for each item below. We’ll also write a quick explanation of each tool below the list.
- Screen spline (link)
- Screen Tight Vinyl Base and Cap (link)
- Impact Driver
- Roller Knife
- Rubber Mallet
- Hammer
- Temp Screen Clips (link)
Screen Spline
This is the rubber tubing that will fit into the track which holds the screen in place. This will be used up as part of the project. We prefer D spline, but there is a lot of debate online between flat and D shaped spline.
Our community is average homeowners, and our preference is for the D shaped spline as we find it easier to get the tight fit. I’m not an expert enough to enter the debate, and I’m certainly not asserting which of the two options is better. Just that I prefer D shaped spline.
Vinyl Base Channel and Cap
There are several companies that make the base channel and caps. The are PVC hardware that attach to the frame. The bases have the channel in which the screen is pushed into.
It’s possible to simply use lumber all the way around rather than these premade channels, but we found this greatly increases the complexity for minimal cost savings.
In some cases, we’ve found that using wood instead of the manufactured channels increases the overall price of the project.
The caps are sold as part of the kit with the channel. Once the screen is set in place, you will gently pound the cap onto it with a rubber mallet. If you make a mistake, you can get the two pieces separated by gently prying them apart with a flathead screw driver.
Impact Driver or Drill
Most amateur DIY homeowners won’t own an impact drill. In fact, many people may not even know the term. In a nutshell, an impact driver is a more compact drill that has more torque and lower RPM.
If you have a wood deck, then you’ll be fine using only a standard cordless drill. If you have concrete or other masonry that needs to holes in it, you’ll be better of getting an impact driver or hammer drill.
Both of these have an action that will chip away at the harder surfaces. An impact driver has more uses than a hammer drill so if you’re going to purchase one, we’d suggest that one. Either a hammer drill or an impact driver can be rented from your local Home Depot if you’re only going to use it for this project.
Rollerknife
A roller knife is a specialized tool that you’ll only need for this project, but it is so inexpensive we recommend just buying one. It will be needed anytime a screen tears and you want to replace it.
The rollerknife is a small compact toll about the same size as a screwdriver, and it costs around $10. It is used to push the spline and screen in the channel and create a tight seal.
The knife end of the rollerknife is used to cut the excess edges from the screen after it’s fully put into the frame.
Rubber Mallet
The rubber mallet is used to gently pound the cap onto the base frame. There is nothing special to this. You just don’t want to use a standard hammer as that will damage the frame’s outer cap.
Hammer
Yep, just a standard hammer will do. You’ll want this to drive in any nails between two pieces of wood.
Temp Screen Clips
These are a fantastic addition to the project that makes it much more beginner friendly. These hold the screen to the channel while you are using the rollerknife to force the spline and screen into the channel.
The clips are removed after the spline is fully pushed in and this just makes it much easier for beginners to get a tight seal without worrying about tearing the screen or getting the dreaded bubbles.
Attach Top and Bottom Plate
The top and bottom plate will be a piece a pressure treated lumber. For most homes a 2′ by 4′ will be the right choice. We recommend painting and sealing the wood before installing it. Painting is far easier when it is on the ground or on the table. Also, we’ve seen some homeowners that plan to do the painting after the screen is installed, but this just leads to a messy of paint splatters.
If you have a wood deck, adding the plates is very easy. You simply need to screw them into the deck, and a standard cordless drill will work. If you have a concrete slab, you’ll need to use an impact driver or hammer drill. We’ve included a link to a video showing how to use an impact driver to attach the boards to it.
This is an step that you want to be very careful with. We absolutely recommend using protective eye care and taking all necessary precautions. If you are a beginner DIY person, this may be worth hiring someone to help you lay the bottom plates.
A skilled person handyman could easily get this done in under an hour if you have the tools and equipment ready for them. Remember, you will need a masonry bit to drill the holes into the concrete slab, and you will want to use “Tapcon” screws.
- BIT INCLUDED IN EACH BOX-Proper bit equals improved holding values and reduced cost
- SLOTTED HEX HEAD-Can be driven with a nut driver
- SELF-TAPPING-Taps threads directly into masonry and requires no other anchor
- DIAMOND POINT-Easier to drive the screw to save time

These screws are specifically designed to go into stone, concrete and masonry. Traditional screws simply wont dig into the concrete slab and will therefore not provide the structural support than you are looking for.
Attach studs between the top and bottom plates.
There are two ways of adding the studs vertically between the top and bottom plates. The first is to carefully measure and assemble the entire wall before tilting it upright.
The advantage of this approach is that is is far easier to connect the vertical studs to the top and bottom plates.
There are many videos showing people using this technique; however, we don’t advise it for most amateur homeowners. The reason is that patios have a slight slant so that rain will drain off.
When you assemble the full wall on the ground, there is a very big chance that when you try to fit in place that it won’t fit flush in all the areas.
This problem can be completely avoided by fully putting up the top and bottom plate and then measuring each vertical stud individually. This assures a perfect fit. Also, you make certain the studs are perfectly plumb since you are measuring them after they are fully upright.
You can connect the studs to the plates either via toenailing the two boards together. If you’re not familiar with this term it means connecting the boards by placing the nails in at a 45 degree angle.
We’ve heard a lot of people find this to be a little challenging so we wanted to include an easier option. You can use a L support. These can be nailed into the side of each board to provide the support.
This is a much simpler solution because you’re simply putting in the nails straight as you wood for any other surface. They are connected by a strong metal connector so this is stronger.
The only drawback to using the L fasteners is that it will add a few extra bucks to the overall cost of the project. At the time of writing each L bracket costs around $0.75.
When looking for L brackets, we recommend getting galvanized steel brackets. These will last for a decade or more. A slightly cheaper option is stainless streel brackets. These will be about 50% the price, but won’t last as long. They may be suitable for drier climates like Phoenix or California.
When choosing studs, we recommend also choosing pressure treated 2’x4′ lumber. You will want pieces that are long enough to have the board go from the floor to the ceiling.
You do not want to cut these boards because a lot of their strength comes from the fact they are one single piece.
At a minimum, you need one vertical stud at the edge of each side of the screened in porch. Yes, this means against the house and at any corners. The tracks for the screen will be attached to these vertical studs.
You can add as many studs in between as you like.
In addition to adding strength to the screened wall, they the vertical studs also create isolation between screened area. If you have a stud every 72 inches, you can be confident that a single hold in the screen won’t ruin the entire wall.
We also using sections of 72″ or less wide easier to get the screen tight.
One final topic on this is to measure every stud individually. Nearly every patio will have a small slope for drainage. I mention this again because so many people doing this the first time will make this mistake.
Add chair rails as you deem appropriate
Chair rails are horizontal beams placed between the vertical studs about 40″ above the deck. The chair rails provide additional support, and they really help in windy areas. They also provide another anchor point for screening.
If you are just starting out with home improvement projects, adding the chair rail is a great way to make the project even less complicated. You will be working with even smaller dimensions of shade. You will also have an anchor point near at a comfortable height whether that’s going up to the ceiling or down to the floor.
The chair rails will also stiffen the overall frame, and they are a nice design element that most people prefer over a full open wall. Another benefit of the rails is that they create a guard against pushing a TV, couch or chair too far which would rip the screen.
Chair rails will create resistance when you push something against them.
Add vinyl base strips to vertical studs
There are two ways to attach the screen to the frame. The first is by using a kit from Screen Tight. These are premanufactured plastic tracks that allow you to just press the screen into place.
The rails can be cut to length with basic tools, and they simply screw to the wood plates and studs that we installed in the last two steps. We recommend this option for nearly every homeowner.
For the sake of completeness, we want to include that this lumber could also be used to create the screen connectors. There are some carpenters who will take this approach, but as DIYers this adds a lot of complexity and time to the project with very little upside.
Also, as the price of lumber has risen so dramatically over the last year we’ve found the Screen Tight tracks to be a more budget friendly option.
Add vinyl base strips
When adding the base strips, we suggest adding the vertical ones first, and cutting the ends off to fit flush against the top and bottom framing plates. By having 1 solid piece, you the screens will be better supported than if you put a lot of smaller cuts together.
Once all the vertical strips are hung, you will next want to fasten the track to the bottom plate. This should be very simple as it should fit snugly to the lower piece of lumber. If it doesn’t align, you may need to trim a tiny bit of material from the edge of the vertical stud.
Once you finished the bottom vinyl track, we do the top track the same way. The upper one is a little more complicated because it’s harder to reach. You are either working above your head or on a ladder. In either case, this is just a less convenient place than slightly above the floor.
After finishing the studs, plates, you can do the chair rails. If you are on a budget, you can use some of the longer pieces of the track. This isn’t the ideal solution, but it’s the only place in the project we would consider using anything other than a long solid piece.
To get the chair rails tracks, we place it in between the vertical tracks to measure how long these need to be. You then cut these pieces to fit snugly in between.
These should be incredibly easy to attach as you are simply nailing the vinyl track to a piece of wood around waist level.
Choosing right spline
There are two types of splines. Those are straight and D-shape. The straight are long thin strips of rubber. The straight remind me of a fettuccini pasta. The D shape spline have one side flat, but a slight curve on the other side hence their name.
There is a lot of demand and strong opinions on each side as to which is better. We are just homeowners so we are not trying to insert ourselves into the debate. Our opinion is that for most people the “D-Shape” is preferable for most members of our community.
I believe this is more forgiving as it will hold to the track better when not installed perfectly evenly.
You will apply the spline in the next step at the same time as the screens.
When choosing the spline it’s important to choose the right thickness:
- Fiberglass Screen use 0.175 spline
- Aluminum Screen use 0.160 spline
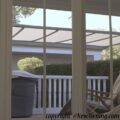
Adding the screen
There are two types of screen, fiberglass and aluminum.
If you have a contractor screen in your porch, the default will be fiberglass screening. Also, if the material isn’t explicitly mentioned, you can assume it will be fiberglass as that makes up more than 80% of all installations.
Fiberglass is less expensive. It will last 3 years or longer, and it has a UV resistant coating which will have some impact to lower your energy usage for the room.
Aluminum screening is a luxury upgrade that you will be aware with if you choose to pay extra for it. It has a much longer lifespan. The screens will be far more resistant against wind, rain or hail. Aluminum may be recommended or possibly required for areas with hurricanes or other storms.
Aluminum frames are odorless, and they are also far superior when it comes to lowering your overall energy usage. They are not covered with the UV blockers, but aluminum is a very poor conductor of energy. Using this means the entire screen will work as a heat sink. The openings of the screen also mean there is a lot of surface area to constantly be cooling the porch.
When you go to add the screen, you will want to measure the opening between the frames. We recommend cutting the screen slightly larger than you need. you can always trim the ends after the fact, but if you cut it too small there is no way to salvage the piece by lengthening it after the cut.
Once the screen is cut to your desired size, you will want to place it and the spline in the track. You then use the roller side of the roller knife to press the spline and screen tightly into the track.
It’s best to go slowly to ensure the screen goes in smoothly without bubbling. Remember, it’s easy to get in right the first time, but much harder to fix an error once it has been made.
If this is your first time installing screens, we recommend starting with the smaller openings to practice. If you make a mistake, it may be easiest to pull the spline and screen out of the channel for that edge and just start from the corner.
This is another reason we suggest starting from the smallest openings because any work that has to be redone will use the a smaller amount of raw materials. Taking the screen out of the track and resetting it shouldn’t damage the screen if you take it out slowly.
You will need to toss out the spline though and just start with fresh spline with each attempt at putting it into the track.
We’ve included a video showing how to set the screen and spline into the screen tight channel.
Adding the framing caps
The final step is to attach the caps over the vinyl base tracks. This is a very simple process as the caps should just snap on. It’s best to align them so they look aligned and then gently tap them with a rubber mallet.
You don’t want to use a regular hammer as that can damage the caps. Once you get the first edge aligned, you can just slowly tap down the strip to connect it all the way to the end.
If it bubbles or develops a ripple, you can pry the cap off by placing a flat head screwdriver between the cap and the underlying channel to pry them apart. You will want to go slowly and in small segments. If you do this, neither the track nor the cap should break so that both can be reused.
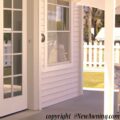
Adding the screen door
Adding a screen door to your new screened porch is a project on it’s own. We’ve created full guide on how to replace your screen door on a covered patio.
You can follow this guide for the exact steps, but you can skip the parts that reference how to take down the old door since you’re doing a completely fresh install.
How much does it cost to screen a porch?
The material cost to screen a porch is about $3 per square foot. This means screening a porch that has 8′ from floor to ceiling with a patio that is 8’x10′ would mean that you’d need 8’x8′ or 64 sq. ft. of material for one wall and 8’x10′ or 80 square foot of material for the longer wall. For both walls, you could expect to spend 144 x $3 or $432 for materials.
Labor will cost around $2 per square foot which would add another $288 to the project. If you’d prefer to outsource the work instead of handling it as a DIY project.
How do you repair a hole in your screened porch?
There are two ways to repair hole in your screen. If you’ve installed the screen yourself, it’s a minor fix to simply replace the screen panel that got damaged. You simply pull the damaged screen out of the track, cut a slightly bigger piece than you need, and then press it in place with your roller knife.
If the screen gets damaged on your door or you don’t have extras of all the materials laying around, you may find it easier to use some screen repair tape. I’ve included pictures taken from a screen we repaired at our home. This was not a repair we spent a lot of time on.
It is an old screen frame on our patio door that we will be replacing. In the meantime, we just needed something to keep insects or the wandering neighborhood cat outside.
If you’re interested in repairing a screen with repair tape, we’ve linked to a great video showing all the steps below:
Here’s a link to the type of tape used in the video:

- 3 LAYER STRUCTURE : Ultra STRONG adhesive & sticky usable for any screen surface. This tape will stay on the surface of your screen door or screen window for long time
- EASIEST TO USE : Only 30 seconds are enough. No tool needed! Just cut and place whatever the size you want to repair the tears and holes in your screen
- SAVE YOUR MONEY & ENERGY : Stop buying expensive whole screen. Problems solved instantly.
- Size : 2" × 15' (XL Size) / High & Low Temperature Resistance / High Quality Fiberglass / no Hazardous Substance to you and your family.
- Fix holes and tears in window screens, screen doors, tent mesh, pool screens, RV screens, and more
Do screened porches keep out bugs?
Screened porches do an amazing job at keeping insects, spiders and scorpions out of your patio. They may not be 100%, but they will greatly cut down the numbers. You will want to repair any holes.
Also, note that while most larger insects are kept out, smaller ants will still find a way. We’ve found they most often find cracks near the patio door so you’ll still need to deal with them.
Are screened porches waterproof?
Screened porches will lower the amount of rain that blows in but, they are certainly not waterproof. Heavy rains with wind will blow the drops through the screen onto the patio.
Pressing through the screen will dampen a lot of the force so the water that comes through will be less, and it won’t travel as far onto the patio.
Are screened porches counted in home’s total square footage?
Definitely not. An area must meet specific criteria to be considered in the the home’s total square footage. The main hurdle is that it must be on the home’s central HVAC system, and you certainly wouldn’t want a screened porch to be on the HVAC system.
Can you put a hot tub on a screened porch?
Yes, you can put a hot tub on an open or covered patio. You can also put a patio on a screened porch or sun room. Screened porches are an ideal place for hot tubs because they create a level of privacy with the screen while allowing the moisture to leave to avoid mold or mildew.
Wrapping Up
That’s it for a guide to converting your covered patio into a screened porch. This is a great beginner DIY home improvement project if you are just starting out. Most HOAs are flexible when it comes to backyard projects. As a reminder, we are not construction professionals or licensed contractors. We are simply average homeowners who enjoy DIY projects around the home. This post as well as all others on our site are intended to be general information and entertainment only. If you have specific questions, we recommend hiring a trained professional who can give you answers for your precise situation. If you’d like to read more articles about screened porches, we have a list of all articles here.